
How to Set Up a Diagnostic Station in Your Shop
Every time a tech wastes ten minutes looking for a tester, jacks up a trailer they could’ve tested standing, or waits for someone else to verify a light issue — the shop pays for it.
That’s why every busy fleet shop should have a dedicated trailer diagnostic station. Done right, it streamlines inspections, saves labor hours, and prevents repeat issues from slipping through. Here's how to build one that works.
Step 1: Choose the Right Location
Your diagnostic station should be located in a spot that’s:
Easily accessible for trailers without having to back them into tight bays
Near your parts storage area or quick-repair zone
Protected from weather and traffic, especially if outdoors
Clearly marked and separated from full-service repair bays
The goal is simple: get trailers in and out for diagnostics — fast, safe, and with zero bottlenecks.
Step 2: Power It Independently
You don’t need to hook up a tractor to perform a full trailer inspection. In fact, relying on tractors slows down your process and ties up equipment.
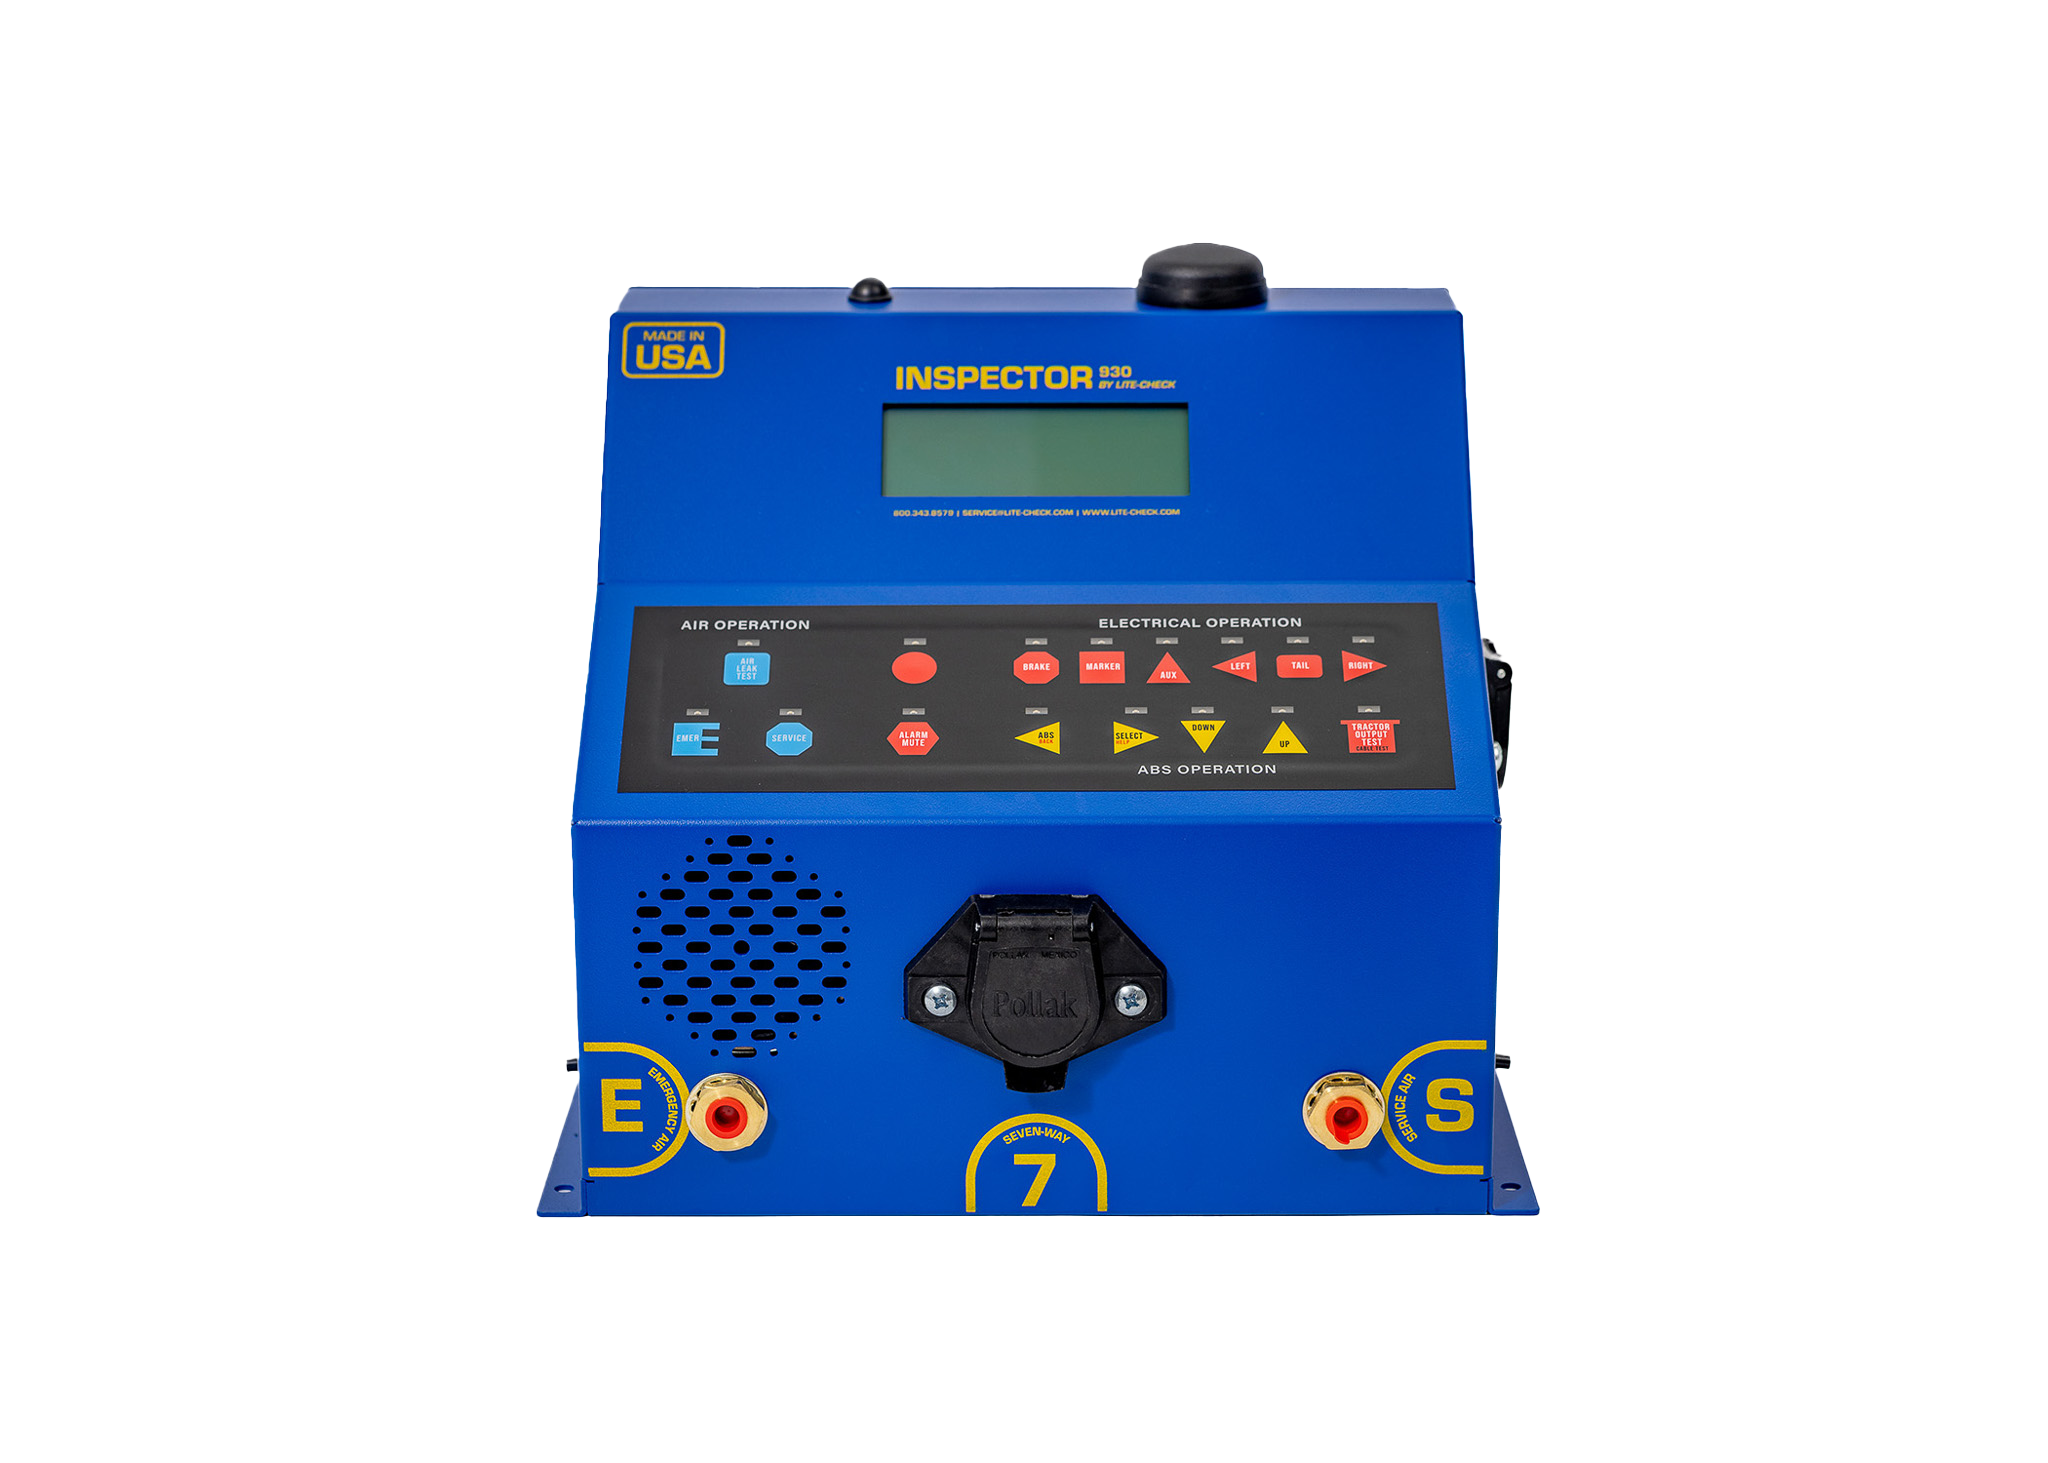
Install a trailer power supply or keep a dedicated Inspector 930 on hand, which powers the lighting, ABS, and air systems all in one. With the 930, your techs can:
Simulate real-world electrical and air loads
Run all lights, brakes, and ABS functions
Pull fault codes
Complete a full inspection without needing a second person
That means fewer workarounds and a repeatable diagnostic process every time.
Step 3: Stock the Essentials
Your diagnostic station should be fully equipped and ready to go — not a place where techs scramble for gear. Build out your setup with:
Inspector 930 unit
7-way plug extenders
Gladhand adapters and lines
Shop air line with dryer/filter
Brake stroke indicators
Clean lighting for visual inspections
Tire gauge and tread depth tool
Sentry Software tablet or workstation (if used)
Mount pegboards, drawers, or bins nearby to keep everything organized and easy to reach.
Step 4: Set a Standardized Process
A diagnostic station is only as good as the process behind it. Use a clear inspection workflow that every tech can follow — and that’s easy to repeat across locations or shifts.
Typical diagnostic flow:
Plug in Inspector 930
Run lighting function tests
Run air pressure decay test
Pull ABS codes
Log results using digital forms or Sentry Software
Tag the trailer for repair or clear for dispatch
This process lets one technician do the full job — no back-and-forth or cross-checking.
Step 5: Make It Repeatable Across Your Operation
Once your station is set up, repeat it. Whether you have one yard or ten, the same station layout and diagnostic flow improves training, inspection quality, and efficiency fleet-wide.
Use the Inspector 930 in every yard. Log results with Sentry Software where applicable. Set expectations that every trailer passes through this process before it moves again.
Build the Station That Pays for Itself
A dedicated trailer diagnostic station saves hours, reduces frustration, and helps your team catch problems before they become violations. The Inspector 930 is built for this exact environment — portable, powerful, and made to run solo diagnostics.
Set your shop up right:
📍 lite-check.com/shop/inspector-930
Or call 509-535-7512 to talk shop layout and outfitting with a Lite-Check expert.