
Diagnosing Electrical Shorts in Trailers
Electrical shorts in trailers are one of the most frustrating causes of repeat failures, road calls, and DOT violations. What starts as a flickering light or blown fuse can quickly lead to unscheduled downtime and service delays.
The key to solving these issues is simple: have a repeatable, accurate method for diagnosing trailer electrical shorts — and use the right equipment to do it.
What Causes Trailer Electrical Shorts?
An electrical short occurs when electricity flows through an unintended path — usually directly to ground or to another circuit. Common causes in trailers include:
Crushed or pinched wiring inside the harness
Corroded plugs or lamp sockets
Exposed wires contacting metal crossmembers
Moisture infiltration in sealed connectors
Incorrectly installed replacement lamps or wiring
These faults can show up intermittently or only when circuits are under load — making them difficult to detect with traditional test lights or basic visual checks.
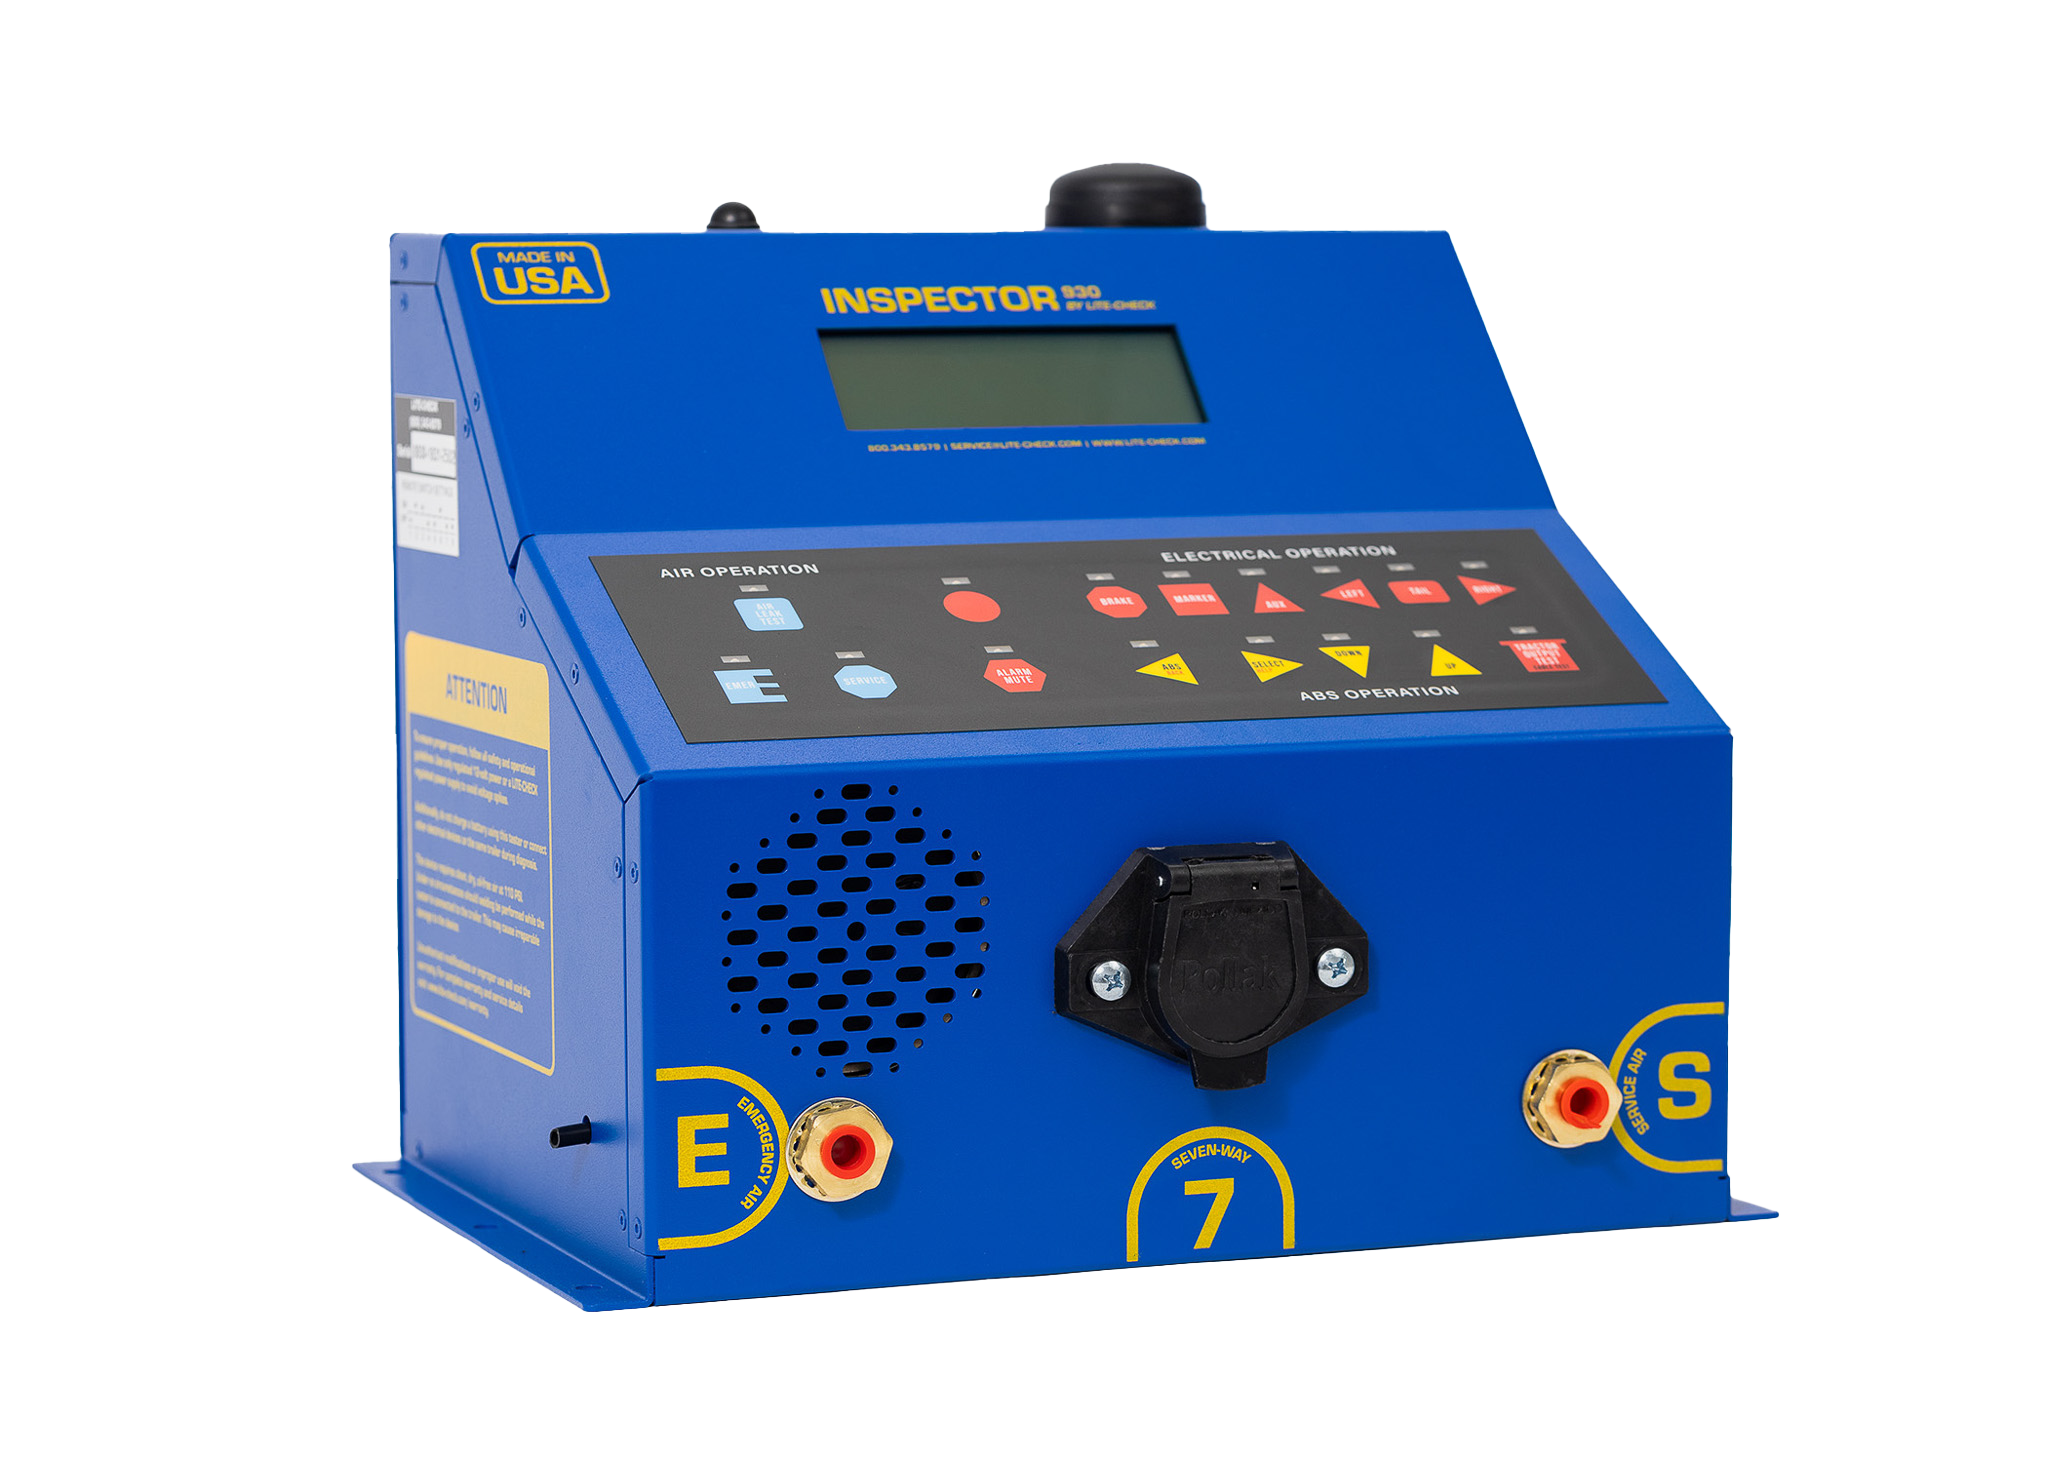
How to Identify Shorts Using the Inspector 930
The Inspector 930 is purpose-built for trailer diagnostics. It powers each circuit independently and simulates real-world load conditions — allowing techs to isolate shorts quickly and without a tractor.
Step-by-step diagnosis:
Connect the Inspector 930 to the trailer’s 7-way plug.
– No tractor needed — the unit powers all lighting circuits.Run each lighting function one at a time.
– Brake, left/right turn, tail, marker, and reverse.Watch for fault indicators.
– The unit shows a clear fail if a circuit is overloaded, shorted, or cross-wired.Isolate the short.
– Disconnect suspect lights or sections of harness. Re-test.
– Once the short clears, you've found the source.Confirm the repair.
– After replacing or repairing the issue, re-test the circuit under load to verify the problem is resolved.
This method eliminates guesswork and allows a single technician to complete a full short-diagnosis without chasing down wires manually.
Hot Zones: Where Shorts Happen Most
Techs should prioritize the following areas when tracing shorts:
The 7-way plug and connector pins
Junction box wiring behind the nose box
Wire runs over suspension hangers and crossmembers
Rear lamp harnesses where vibration is highest
Splice points from past repairs
Most shorts are mechanical in nature — abrasion, pinching, or water intrusion. The Inspector 930 helps pinpoint the location without disassembling the entire trailer.
Stop Repeat Failures Before They Start
One of the biggest challenges in trailer maintenance is avoiding the same issues over and over. A short that’s “fixed” without proper testing often shows back up days or weeks later.
Using the Inspector 930’s load-based diagnostics gives your team:
Confidence that the issue is fully resolved
Proof that circuits are functioning correctly
Reduced return visits and technician rework
Stronger DOT compliance and audit readiness
Build a Repeatable Process Around the Right Tool
Every shop should have a standard method for diagnosing trailer electrical shorts. With the Inspector 930, your process becomes fast, efficient, and reliable — no need to guess or rely on inconsistent test equipment.
Want to improve your electrical troubleshooting process?
Visit 📍 lite-check.com/shop/inspector-930
or call 509-535-7512 to talk with a Lite-Check diagnostics expert.